Airflow at a glance
- Apache Airflow is a workflow managment platform written in python

- Workflows are developed also in python code, perfectly fit to send your « configuration as code » in a git repository.
- You leverage python extra libraries to get enhancement in your pipelines, without the need of clunky langage like XML.
How does it work ?
- Airflow use DAGs standing for Directed Acyclic Graph for worflows orchestration and their dependencies.
- Worflows are read only rendered in a beautiful UI, pay attention that this is not a WYSIWYG tool.
- It uses out of the box core operators (bash, python, email, …) and extended one for all existing providers (http, databases, docker, all cloud vendors like AWS-GCP-Azure, …).
- Scalability is infinite using messaging, in this post we only introduce a local scheduling mode.
Quick demo
Launching Airflow
Even if the official repository provide a docker compose file, I fine tuned the file to simplify the getting started:
- DAGs sample removing to get a brand new cleaned DAGs directory
- Set the orchestrator to local, no clustering
- As usual, add the traefik container and localtest.me domain for a ready to use DNS setup
Once ready, launch these commands
git clone https://github.com/jsminet/docker-apache-airflow.git
docker compose up -d
Open your favorite browser and go to the Airflow login page: http://airflow.localtest.me
Use airflow / airflow as credential and you should see this:

First DAG creation
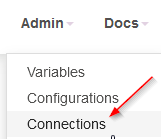
As a prerequisite, create connection to postgres database by clicking on Admin then Connections
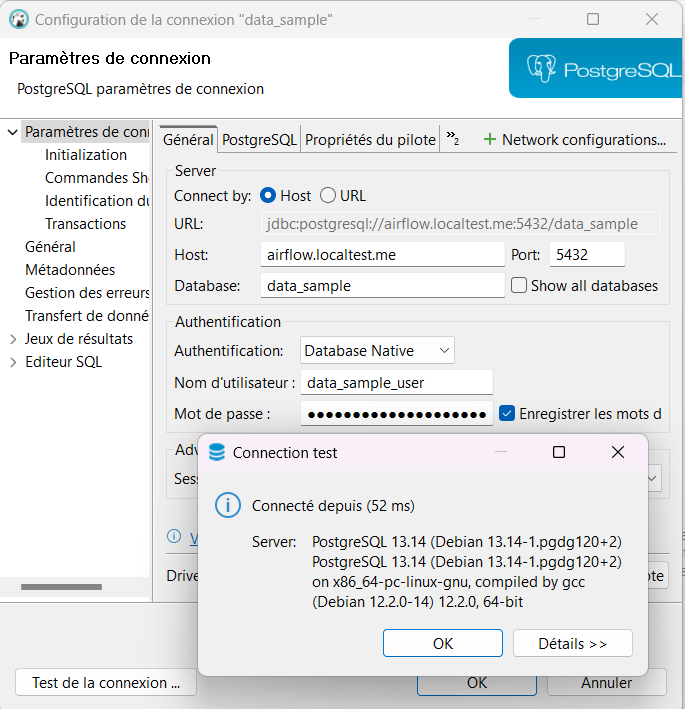
Postgres is part of this docker stack and I placed a script to automatically create a dedicated database for this demo, you can use Dbeaver for instance to test the connection, here are all the connection parameters:
| User | Password | Database | Host | Port |
| data_sample_user | data_sample_password | data_sample | airflow.localtest.me | 5432 |
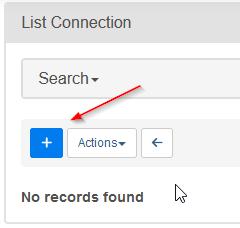
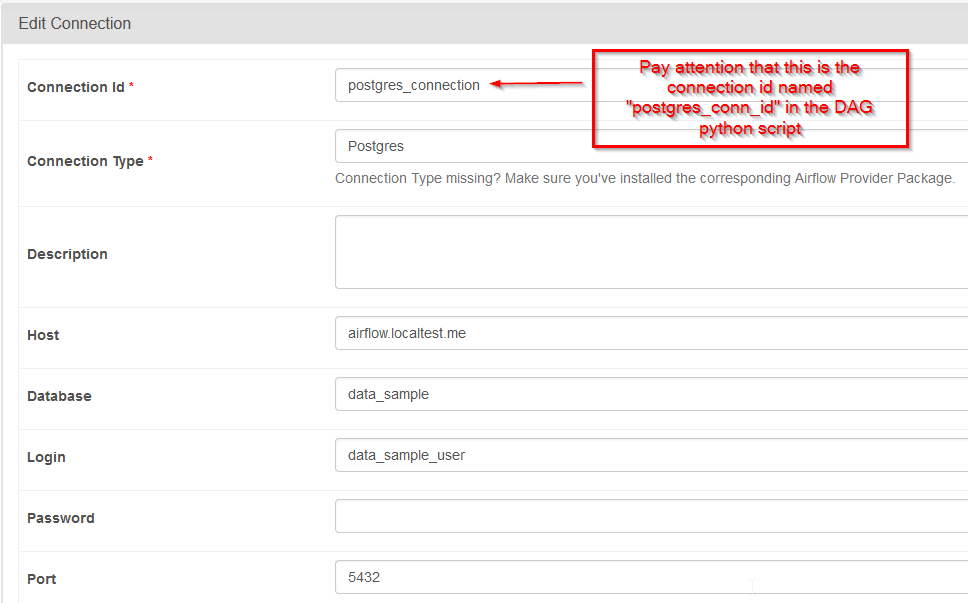
Once connection is done, open your favorite IDE and create a new python file in dags directory and use this code:
# Import datetime module
from datetime import datetime, timedelta
# Import DAG definition
from airflow import DAG
# Import bash operator
from airflow.operators.bash import BashOperator
from airflow.operators.python import PythonOperator
from airflow.providers.postgres.operators.postgres import PostgresOperator

# A simple python function
def greet(name):
    print(f"Hello {name} with python!")
    return name

# The DAG object
with DAG(
    "tutorial_dag",
    description="A simple DAG tutorial",
    default_args = {
        "owner":"JS",
        "retries": 1,
        "retry_delay": timedelta(minutes=5)
        },
    schedule=timedelta(days=1),
    start_date=datetime(2024, 1, 1),
) as dag:

# bash task1 definition object
    task1 = BashOperator(
        task_id="bash_greeting",
        bash_command="echo 'Hello world with bash!'")

# python task2 definition object
    task2 = PythonOperator(
        task_id="python_greeting",
        python_callable=greet,
        op_kwargs={"name":"JS"})

# postgres task3
    task3 = PostgresOperator(
        task_id="postgres_data_insertion",
        postgres_conn_id="postgres_connection",
        sql="""
        CREATE TABLE IF NOT EXISTS
                    tutorial(
                        id SERIAL PRIMARY KEY,
                        current_dag_run TIMESTAMP
                    );
        INSERT INTO tutorial
            (current_dag_run) VALUES ('{{ts}}')
        """)

# Calling the tasks
    task1 >> task2 >> task3
In this DAG, you’ll create three sequential and dependant tasks using three different operators:

- Task 1 -> bash script using bash operator
- Task 2 -> python script using python operator
- Task 3 -> postgres data insertion using a connection using postgres DB operator
To create data into postgres, we will use out-of-the-box default variable you can find on template reference page and an auto increment id (keyword serial)
Launching the DAG
Click on DAG tab then on button Trigger DAG

After succesfull runs, click on Graph to see all the DAG embedded tasks
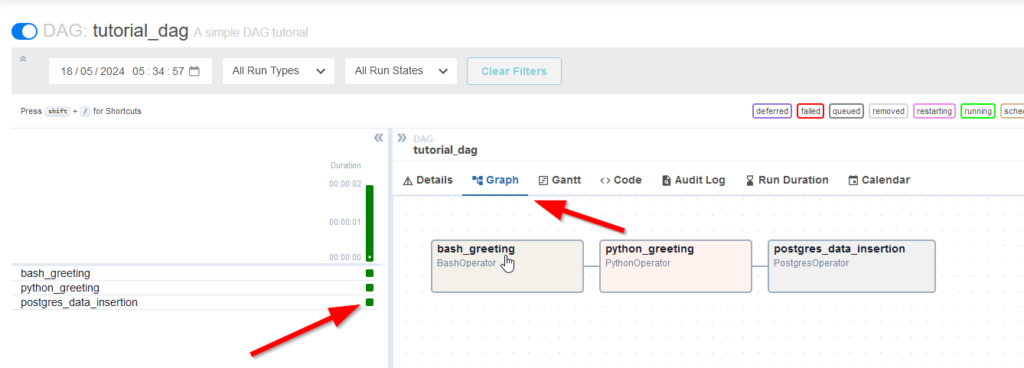
Click on each task green square to activate the Logs tab accordingly

The Logs tab is now available for all different tasks


What’s next
Only a few part of Airflow has been introduced, it’s a powerful scheduler that need others post to explore all the features and possibilities.
Here are some important topics about Apache Airflow you can find in the core concept
- Cross communication using Xcoms
- Making Airflow administration using the CLI
- Managing taskflows using the Rest API
- Using sensors to detect a incoming file on your file system like S3 for instance
- How to make DAG debbuging


Commentaires récents